
This month’s blog is going to be a little different. This year I was tasked by my supervisor to learn more about 3D Printing. I had no idea what I was going to do or how I was going to do it. I thought that I would learn to print something that I could use for one of my hobbies and that’s what I decided to do. This blog is going to be about that journey and the things I learned along the way.
First, before I get into the nuts and bolts of my 3D Printing experience, I need to fill you in on my backstory of how I got to printing this particular item. You see, one of my hobbies for the past 40 years has been collecting historical military vehicles. My hobby is much like any other antique car/gear head enthusiast except I focus on old Army trucks. My current project is a 1952 Dodge M37. Now, this truck was in very poor condition when I got it, and any smart collector would have broken it down for parts and scrapped the rest of the truck. Well, I guess I’m not that smart, but the condition of the truck allowed me to do what in the automotive hobbies is known as a “Resto-Mod” (Restoration Modification), meaning I’m restoring the truck but also making some significant modifications to it.
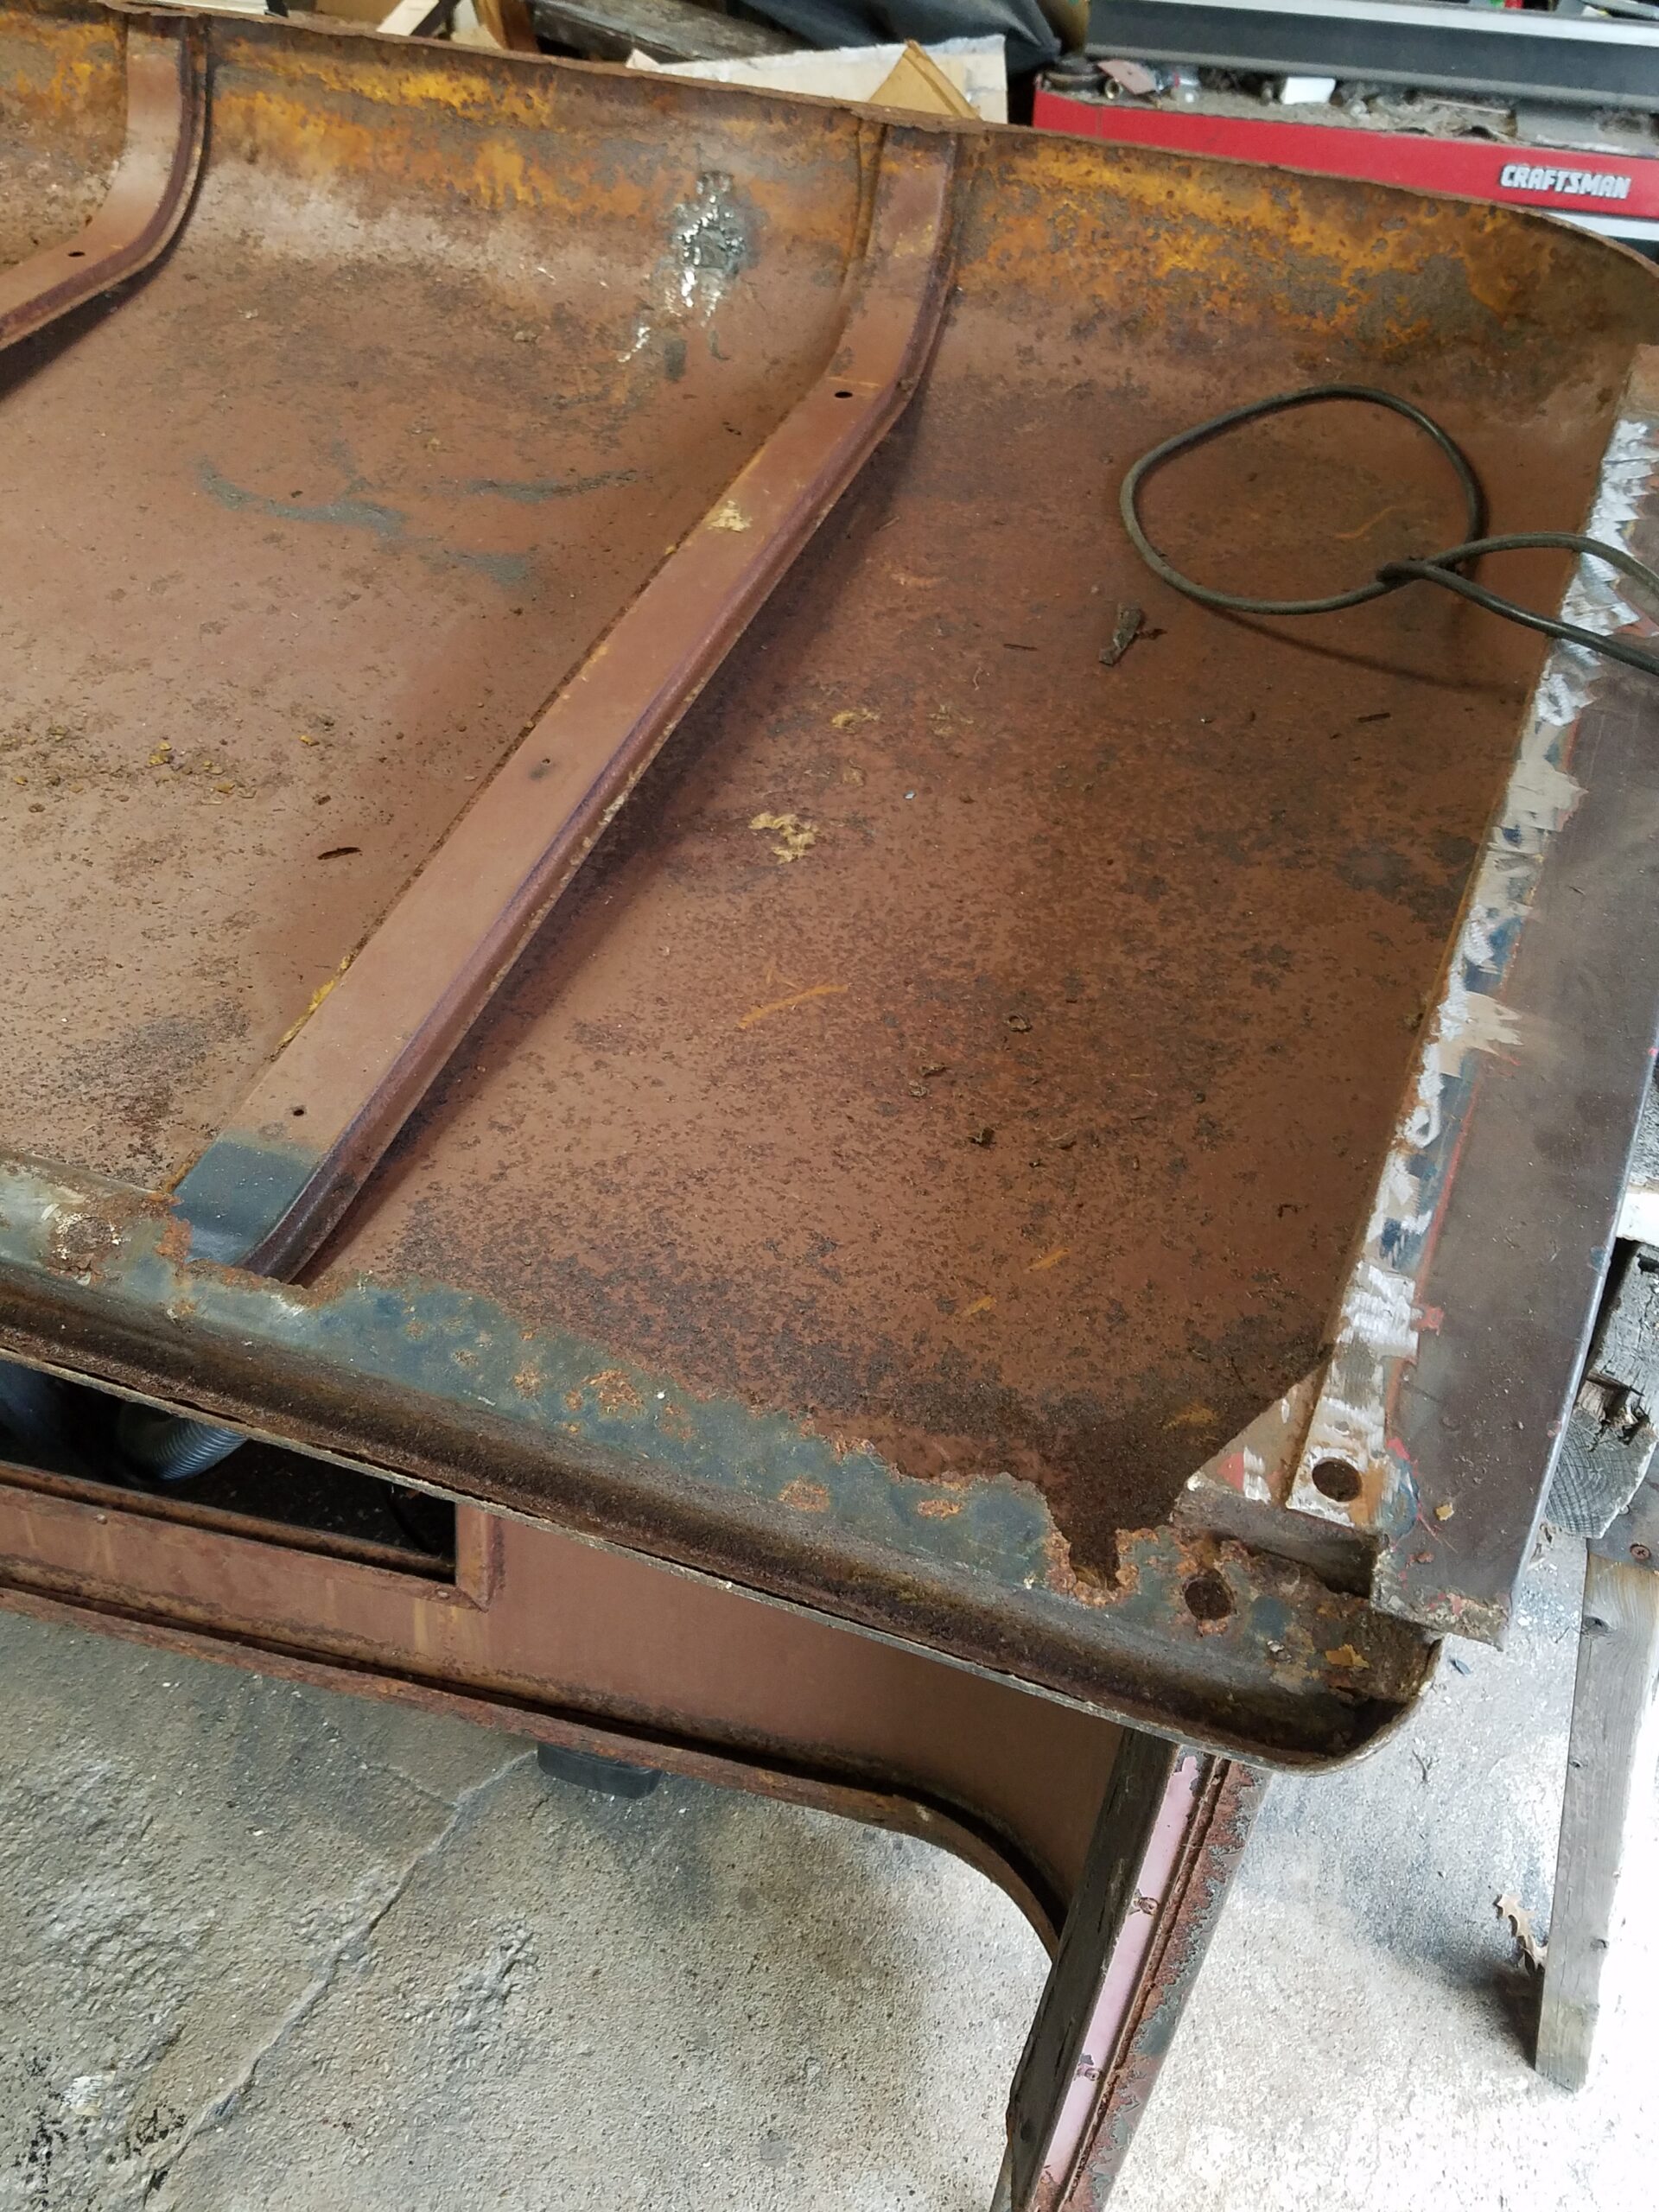
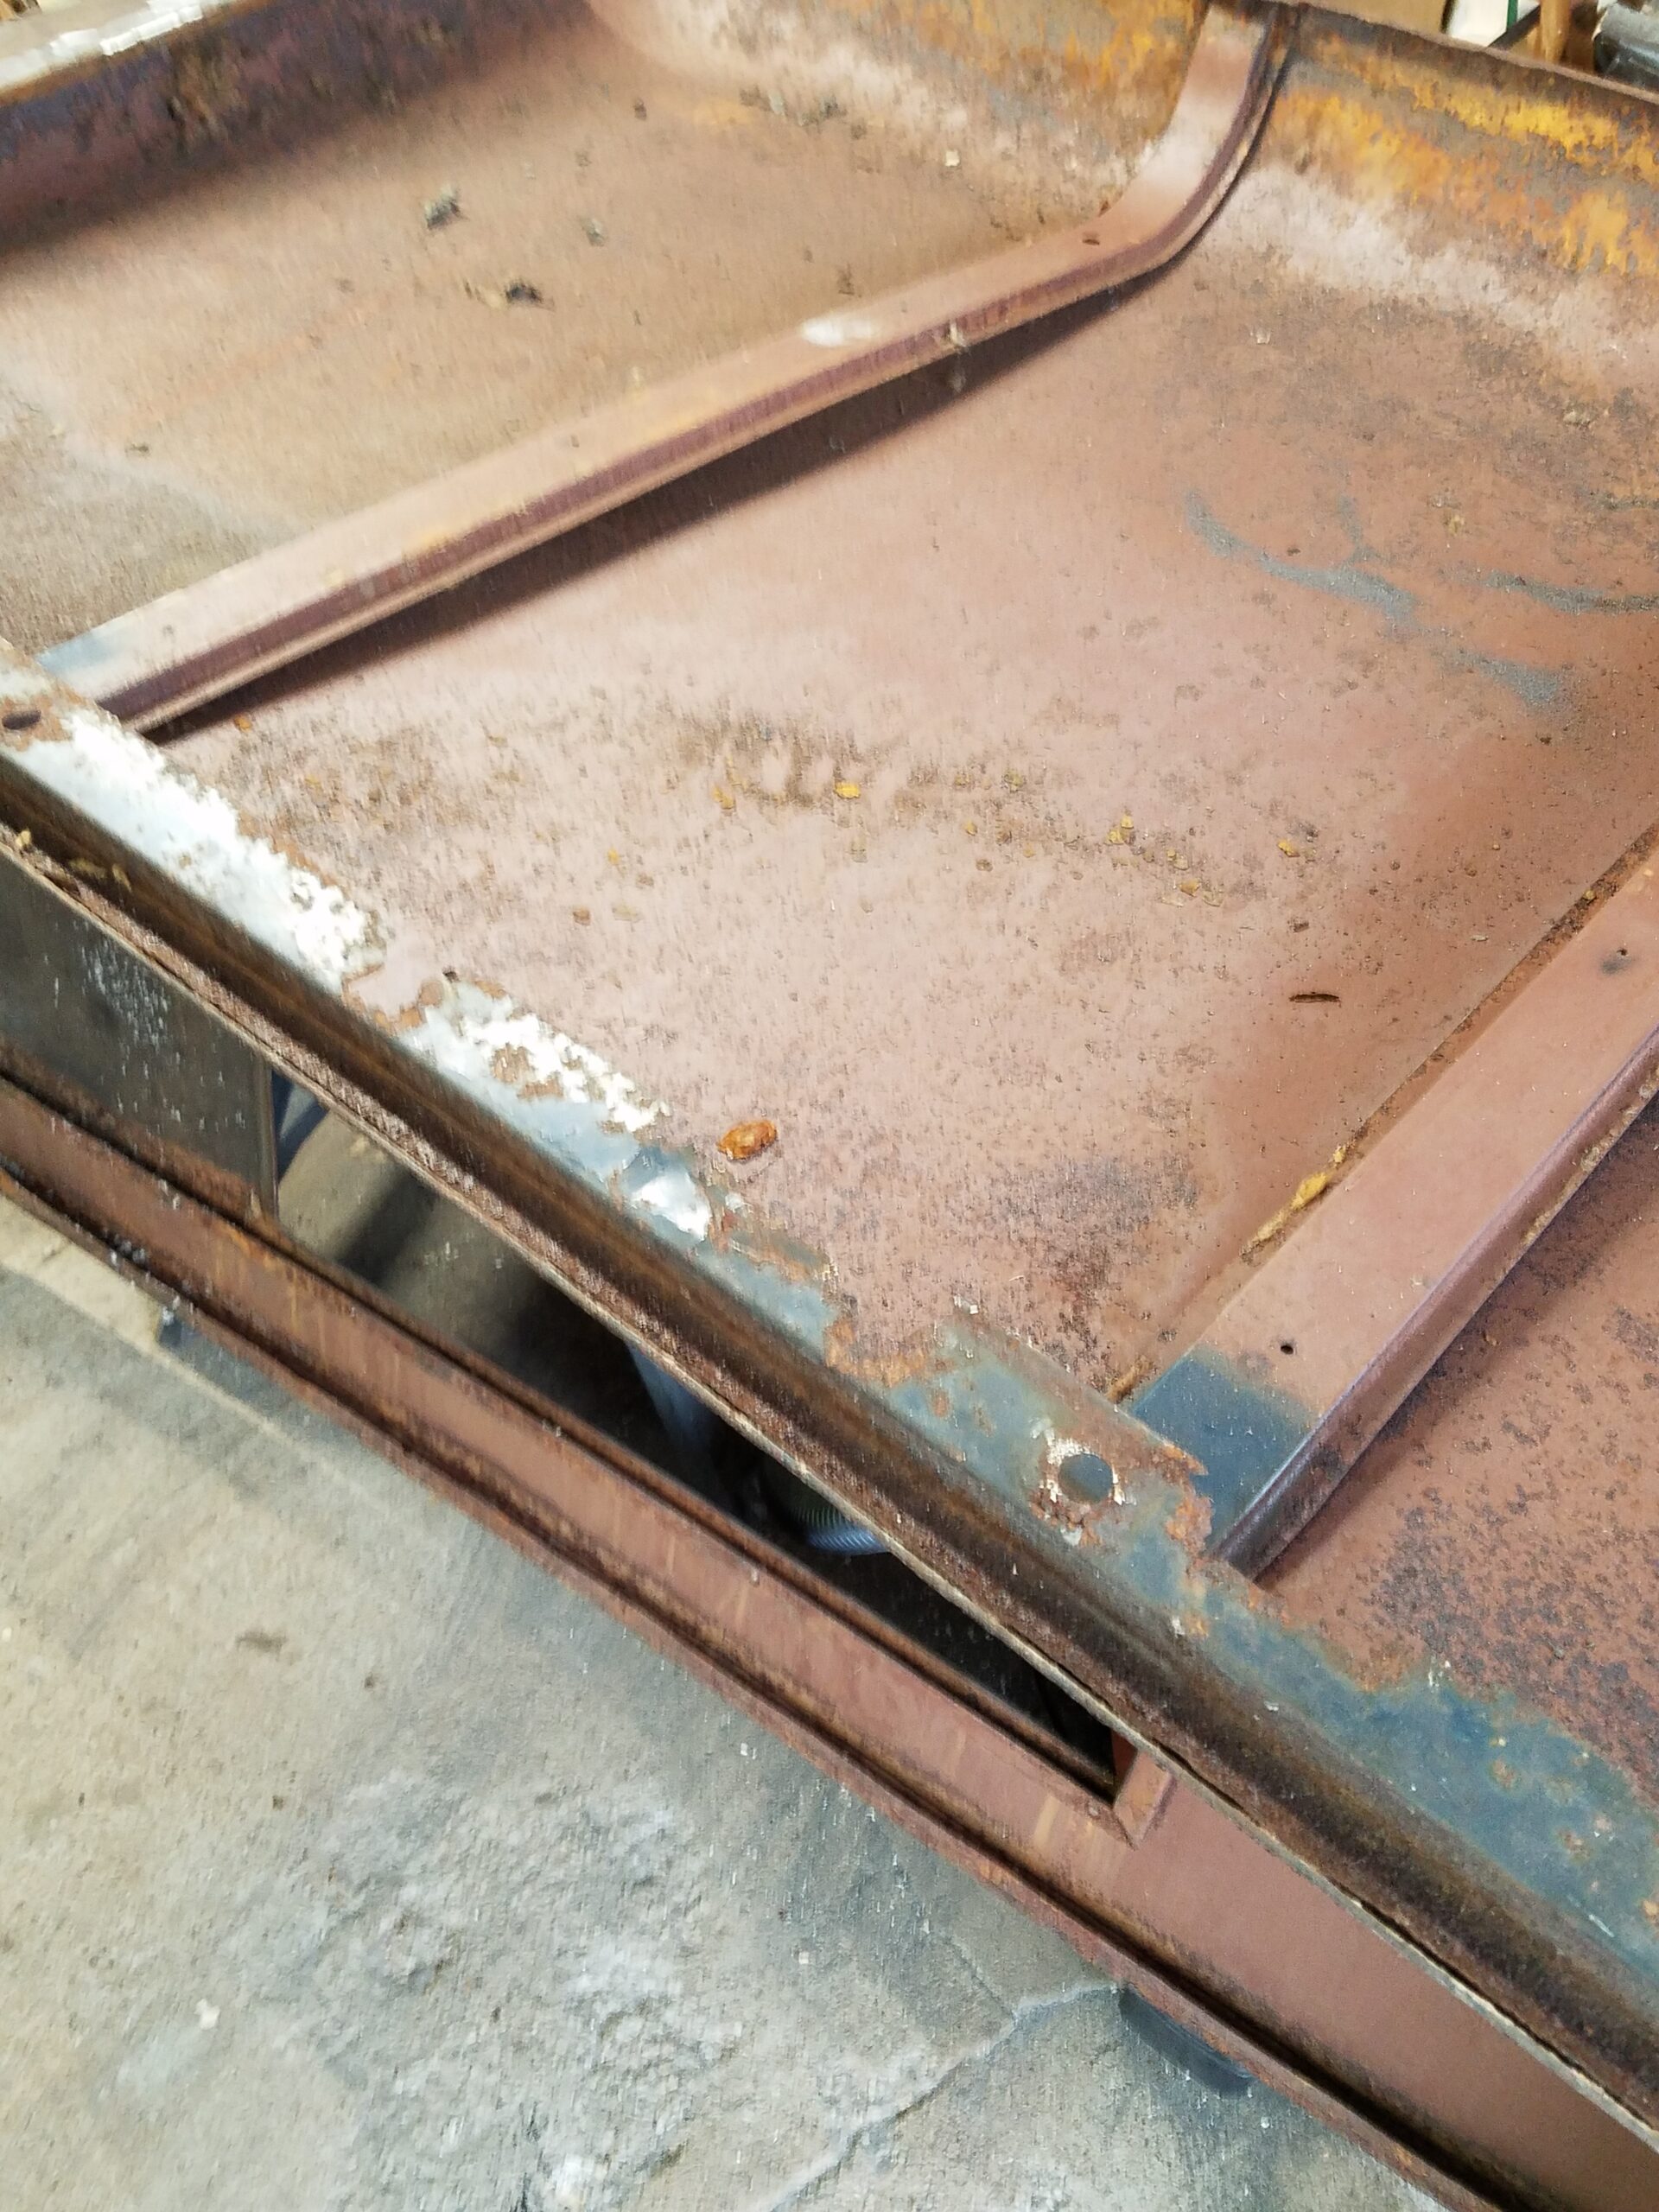
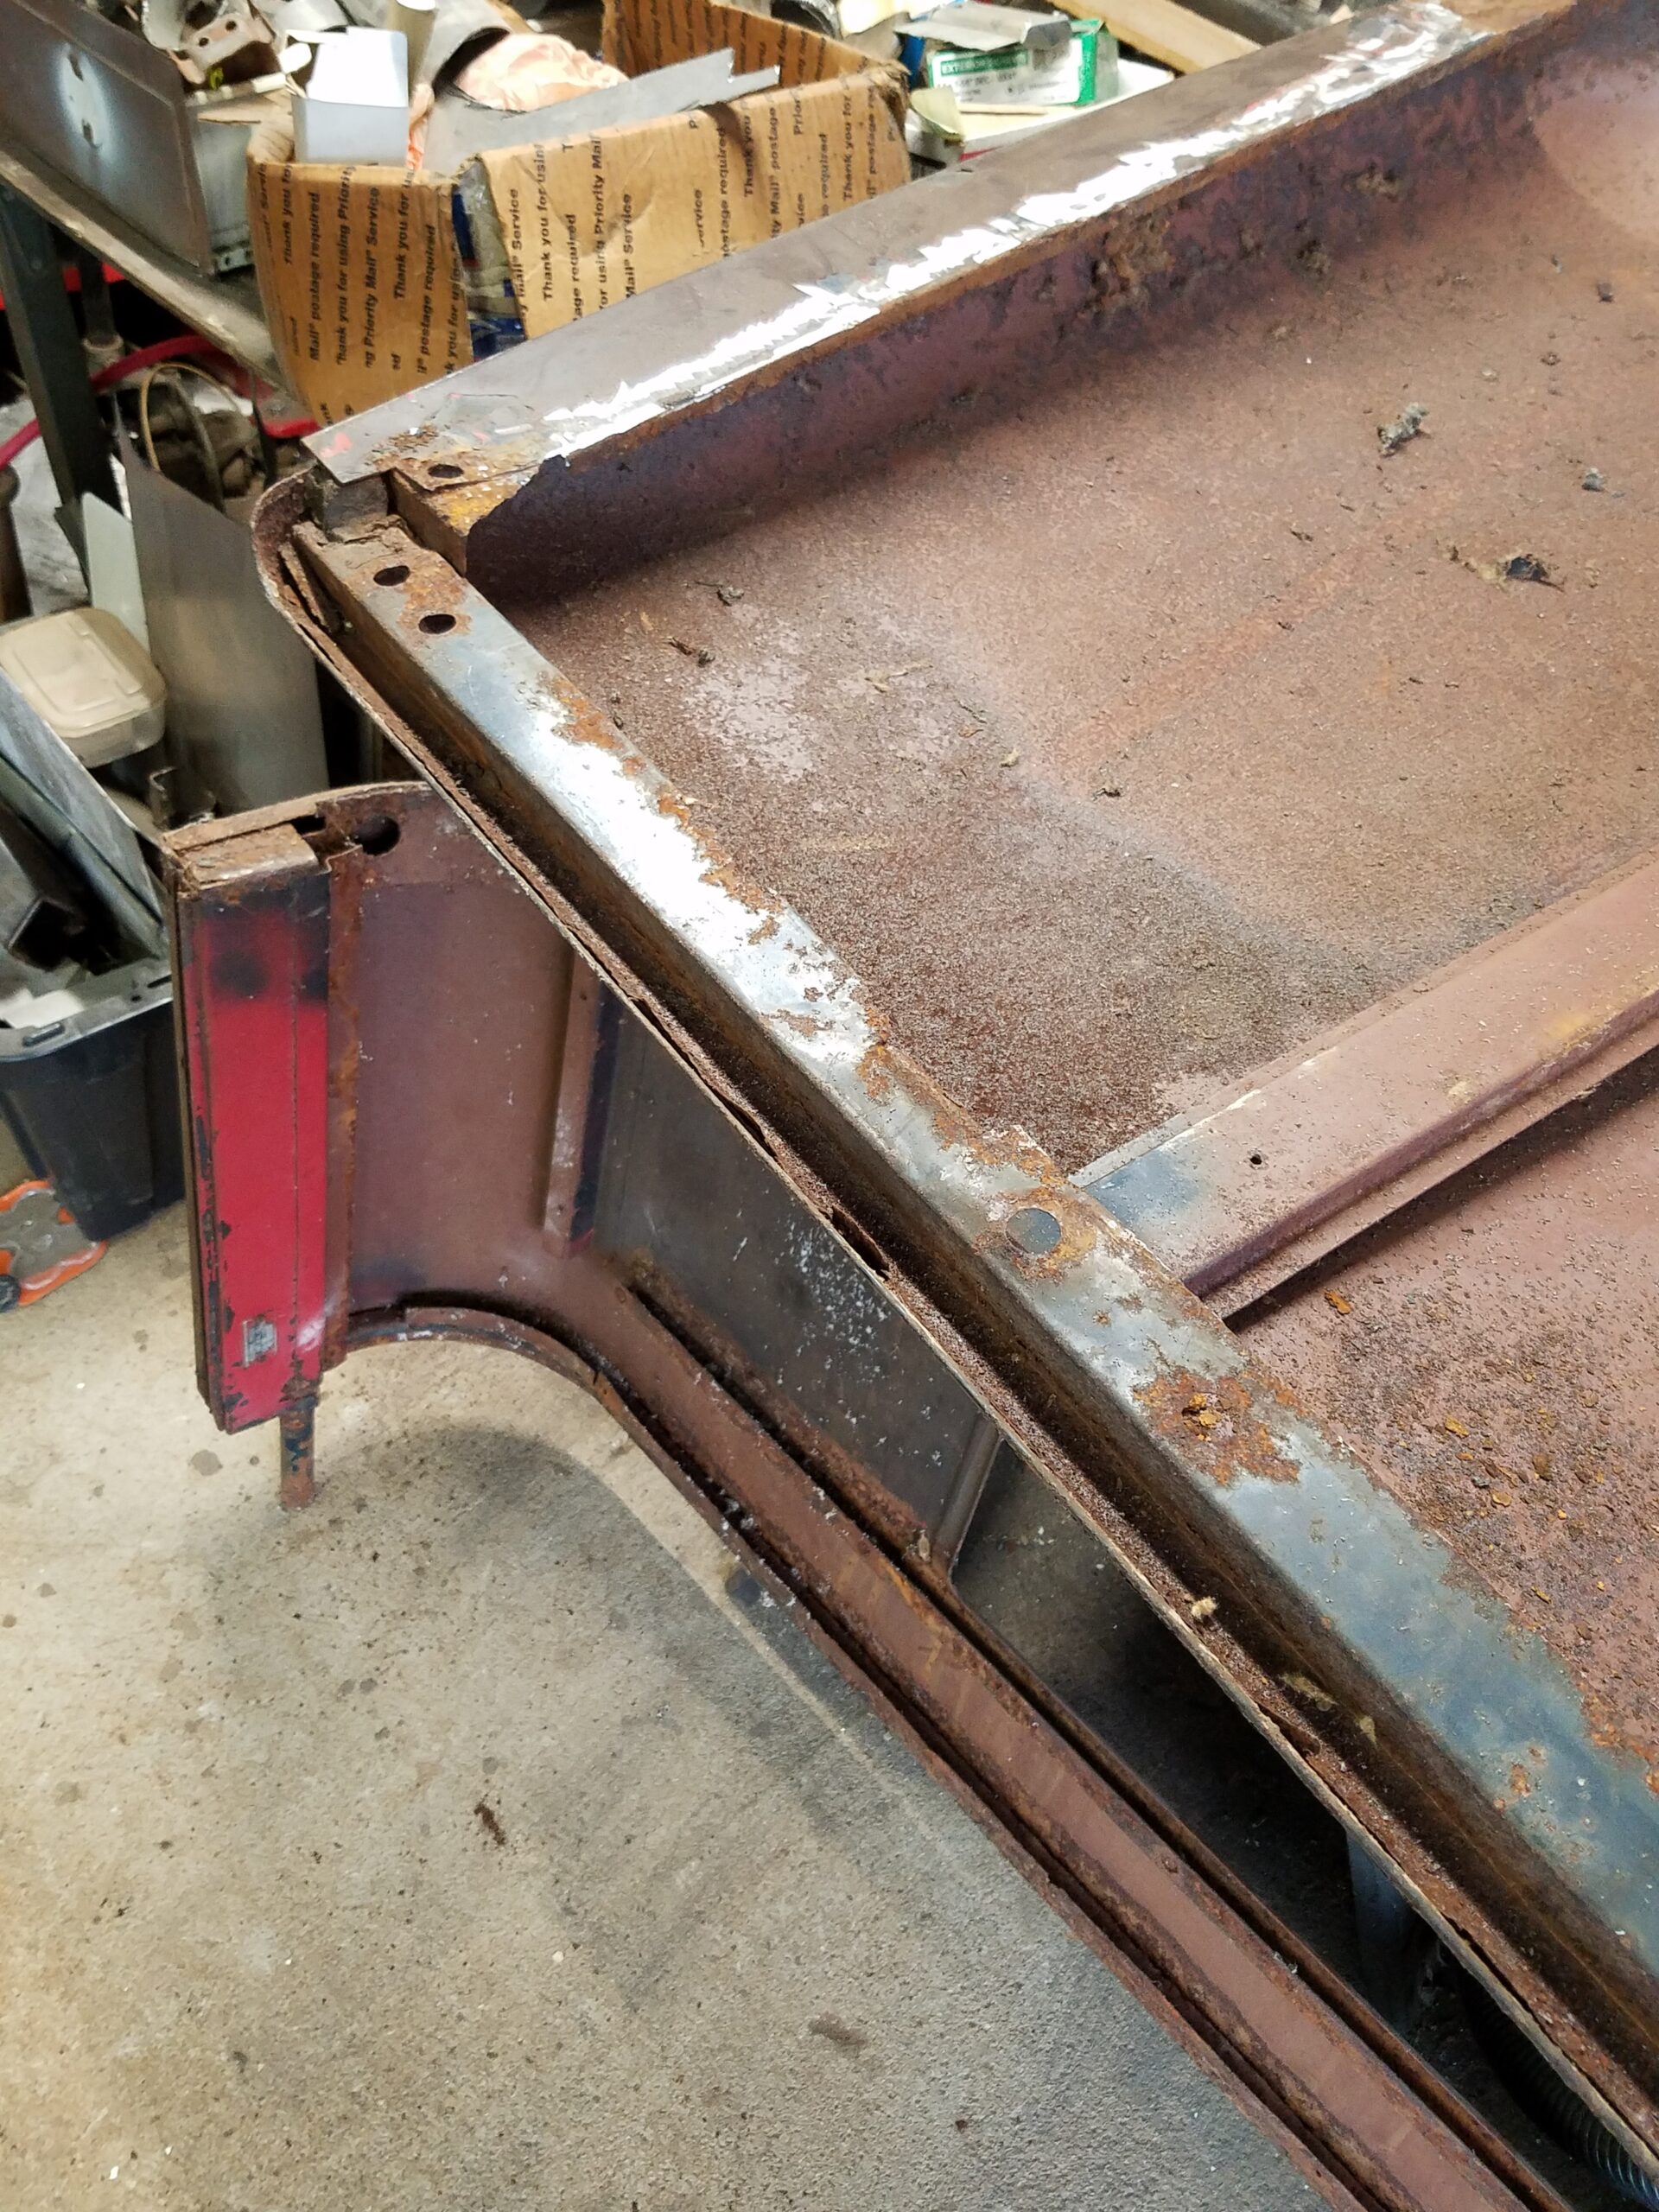
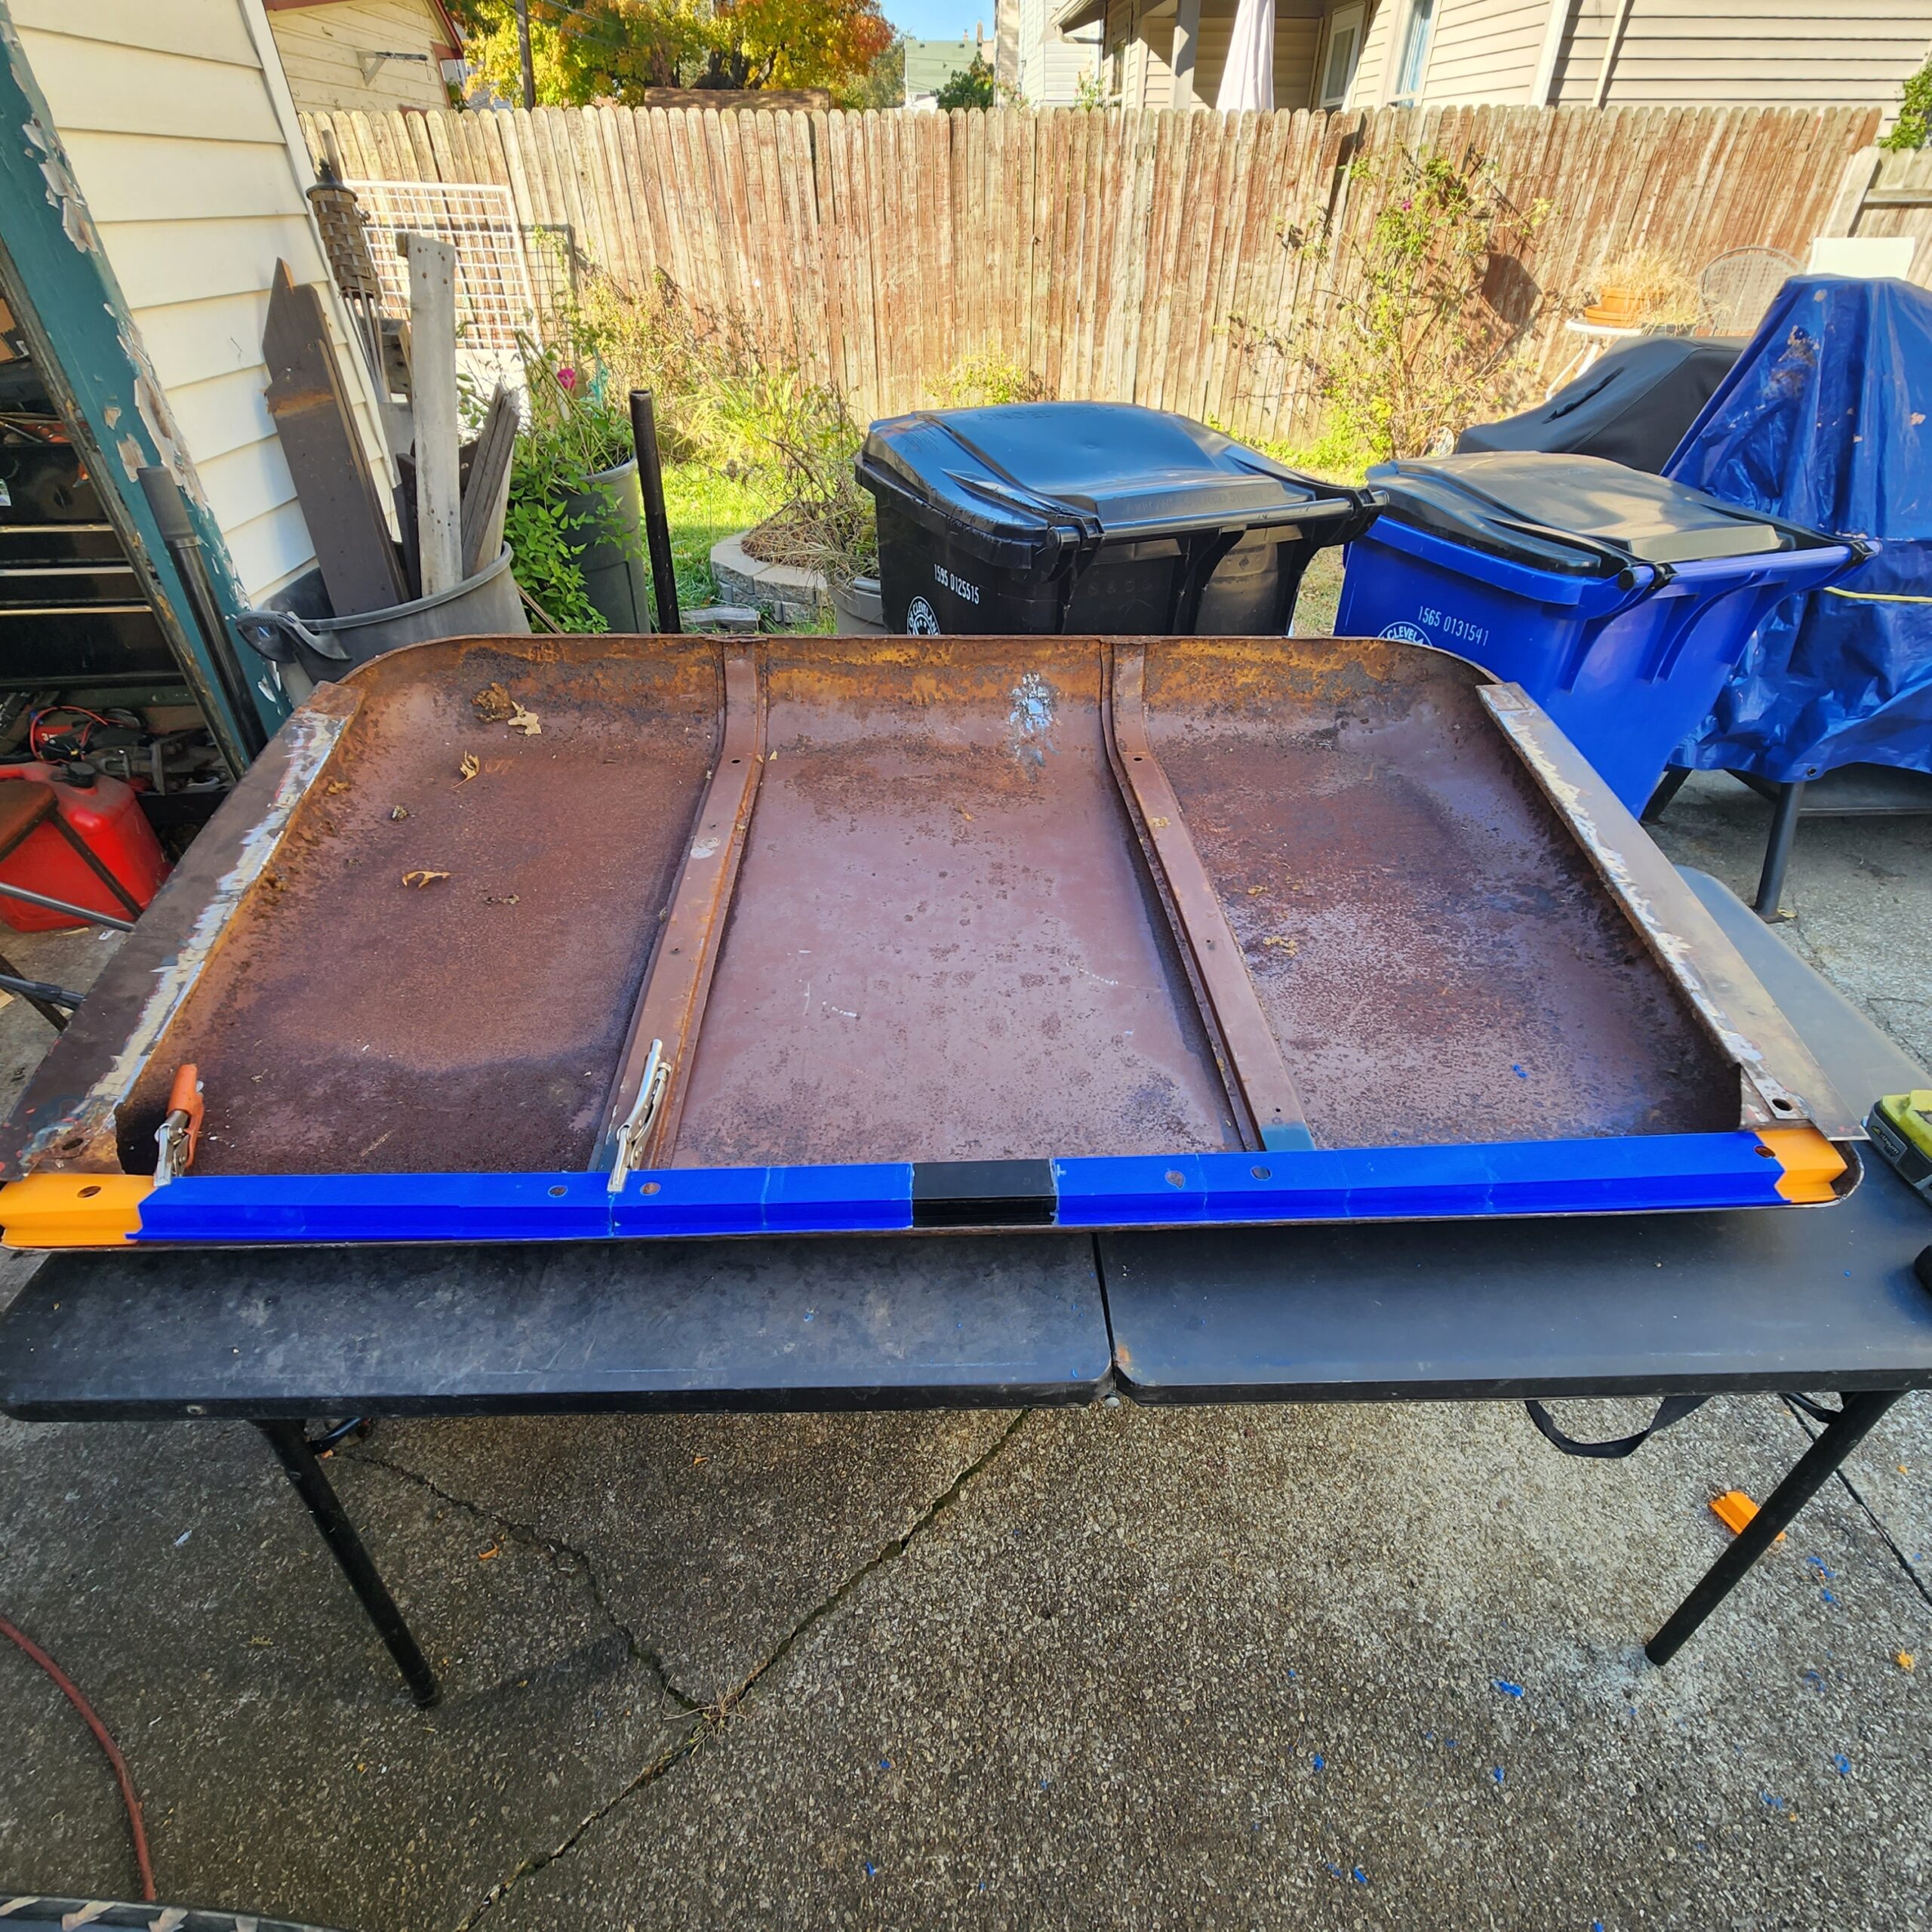
So, as I was considering what I could make and print for myself, I decided to see if I could print a part for the M37 project. At the time, I had been working on the cab roof of the truck. There was a part of the cab roof that was very rusty and needed to be replaced. It was just a thin piece of bent sheet metal and I figured I could get it made up at some place that specializes in metal fabrication. Here is how the area looked.
I found a few places, but the quotes were very high for the job. This is when I got the idea to try to make the piece out of plastic and 3D print it!
The first obstacle I had to overcome is the length of the piece. The cab roof has an internal measurement of 62 inches, but the MakerBot 3D Printers that we have in our Heights Libraries STEAM Lab are not that big and the largest height or length I could print was about 5 inches. That meant that I would have to print many pieces and somehow “glue” them together. I will talk more about this later on.
The next step was to learn how to design in 3D so that I could make the profile of the metal piece. When I spoke with my colleague, Nia, who is our STEAM Lab expert, she suggested I use TinkerCAD at Tinkercad.com . She said that that TinkerCAD is one of the easiest programs to use and that they also offer tutorials to help you learn. She was right!
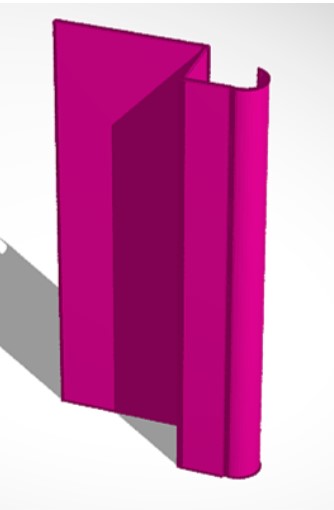
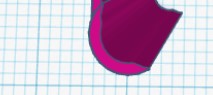
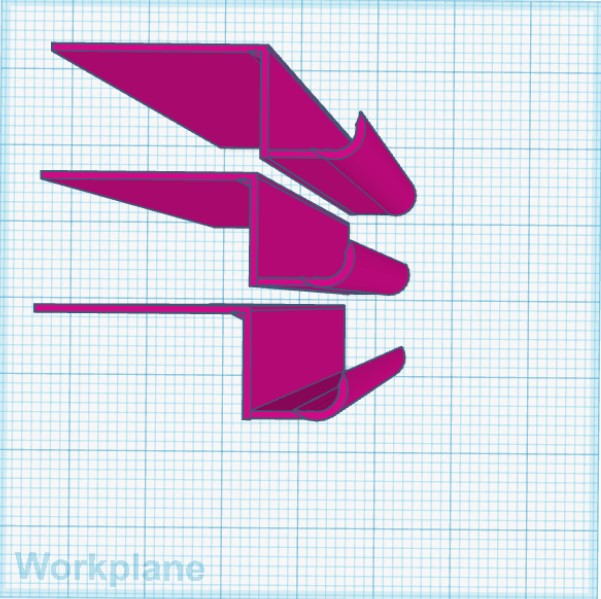
The original profile of what I’m going to call the “roofs hat channel” has a main leg that is 1.5 inches wide, then a 90-degree bend down. The next leg is 1 inch, then another 90-degree bend and a .5-inch piece, and then a J hook at the end which is about .5-inch in length. The J bend is what sits on top of the windshield frame. The overall thickness of the metal is about 22 gauge (or 0.025 inches). Here is what it looks like:
The first three legs were no problem. All I had to do was make three rectangles of different widths, but all the same thickness, and bump them together where I needed them to connect. The J hook, on the other hand, was much more difficult. To make the hook I had to look at it as a tube with half the tube cut off. In TinkerCAD, to remove material, you have to make a solid object and then put a hole in it. I had to make a solid dowel, but then I had to make the hole slightly larger and move the hole off center so that it would cut half of the tube off.

My first few attempts at printing did not turn out as well as I thought they would. My first drafts were too thin, as I was off on the thickness of the material and the very first one I printed was bigger than the actual measurements. I was way off. Here is how it looked:
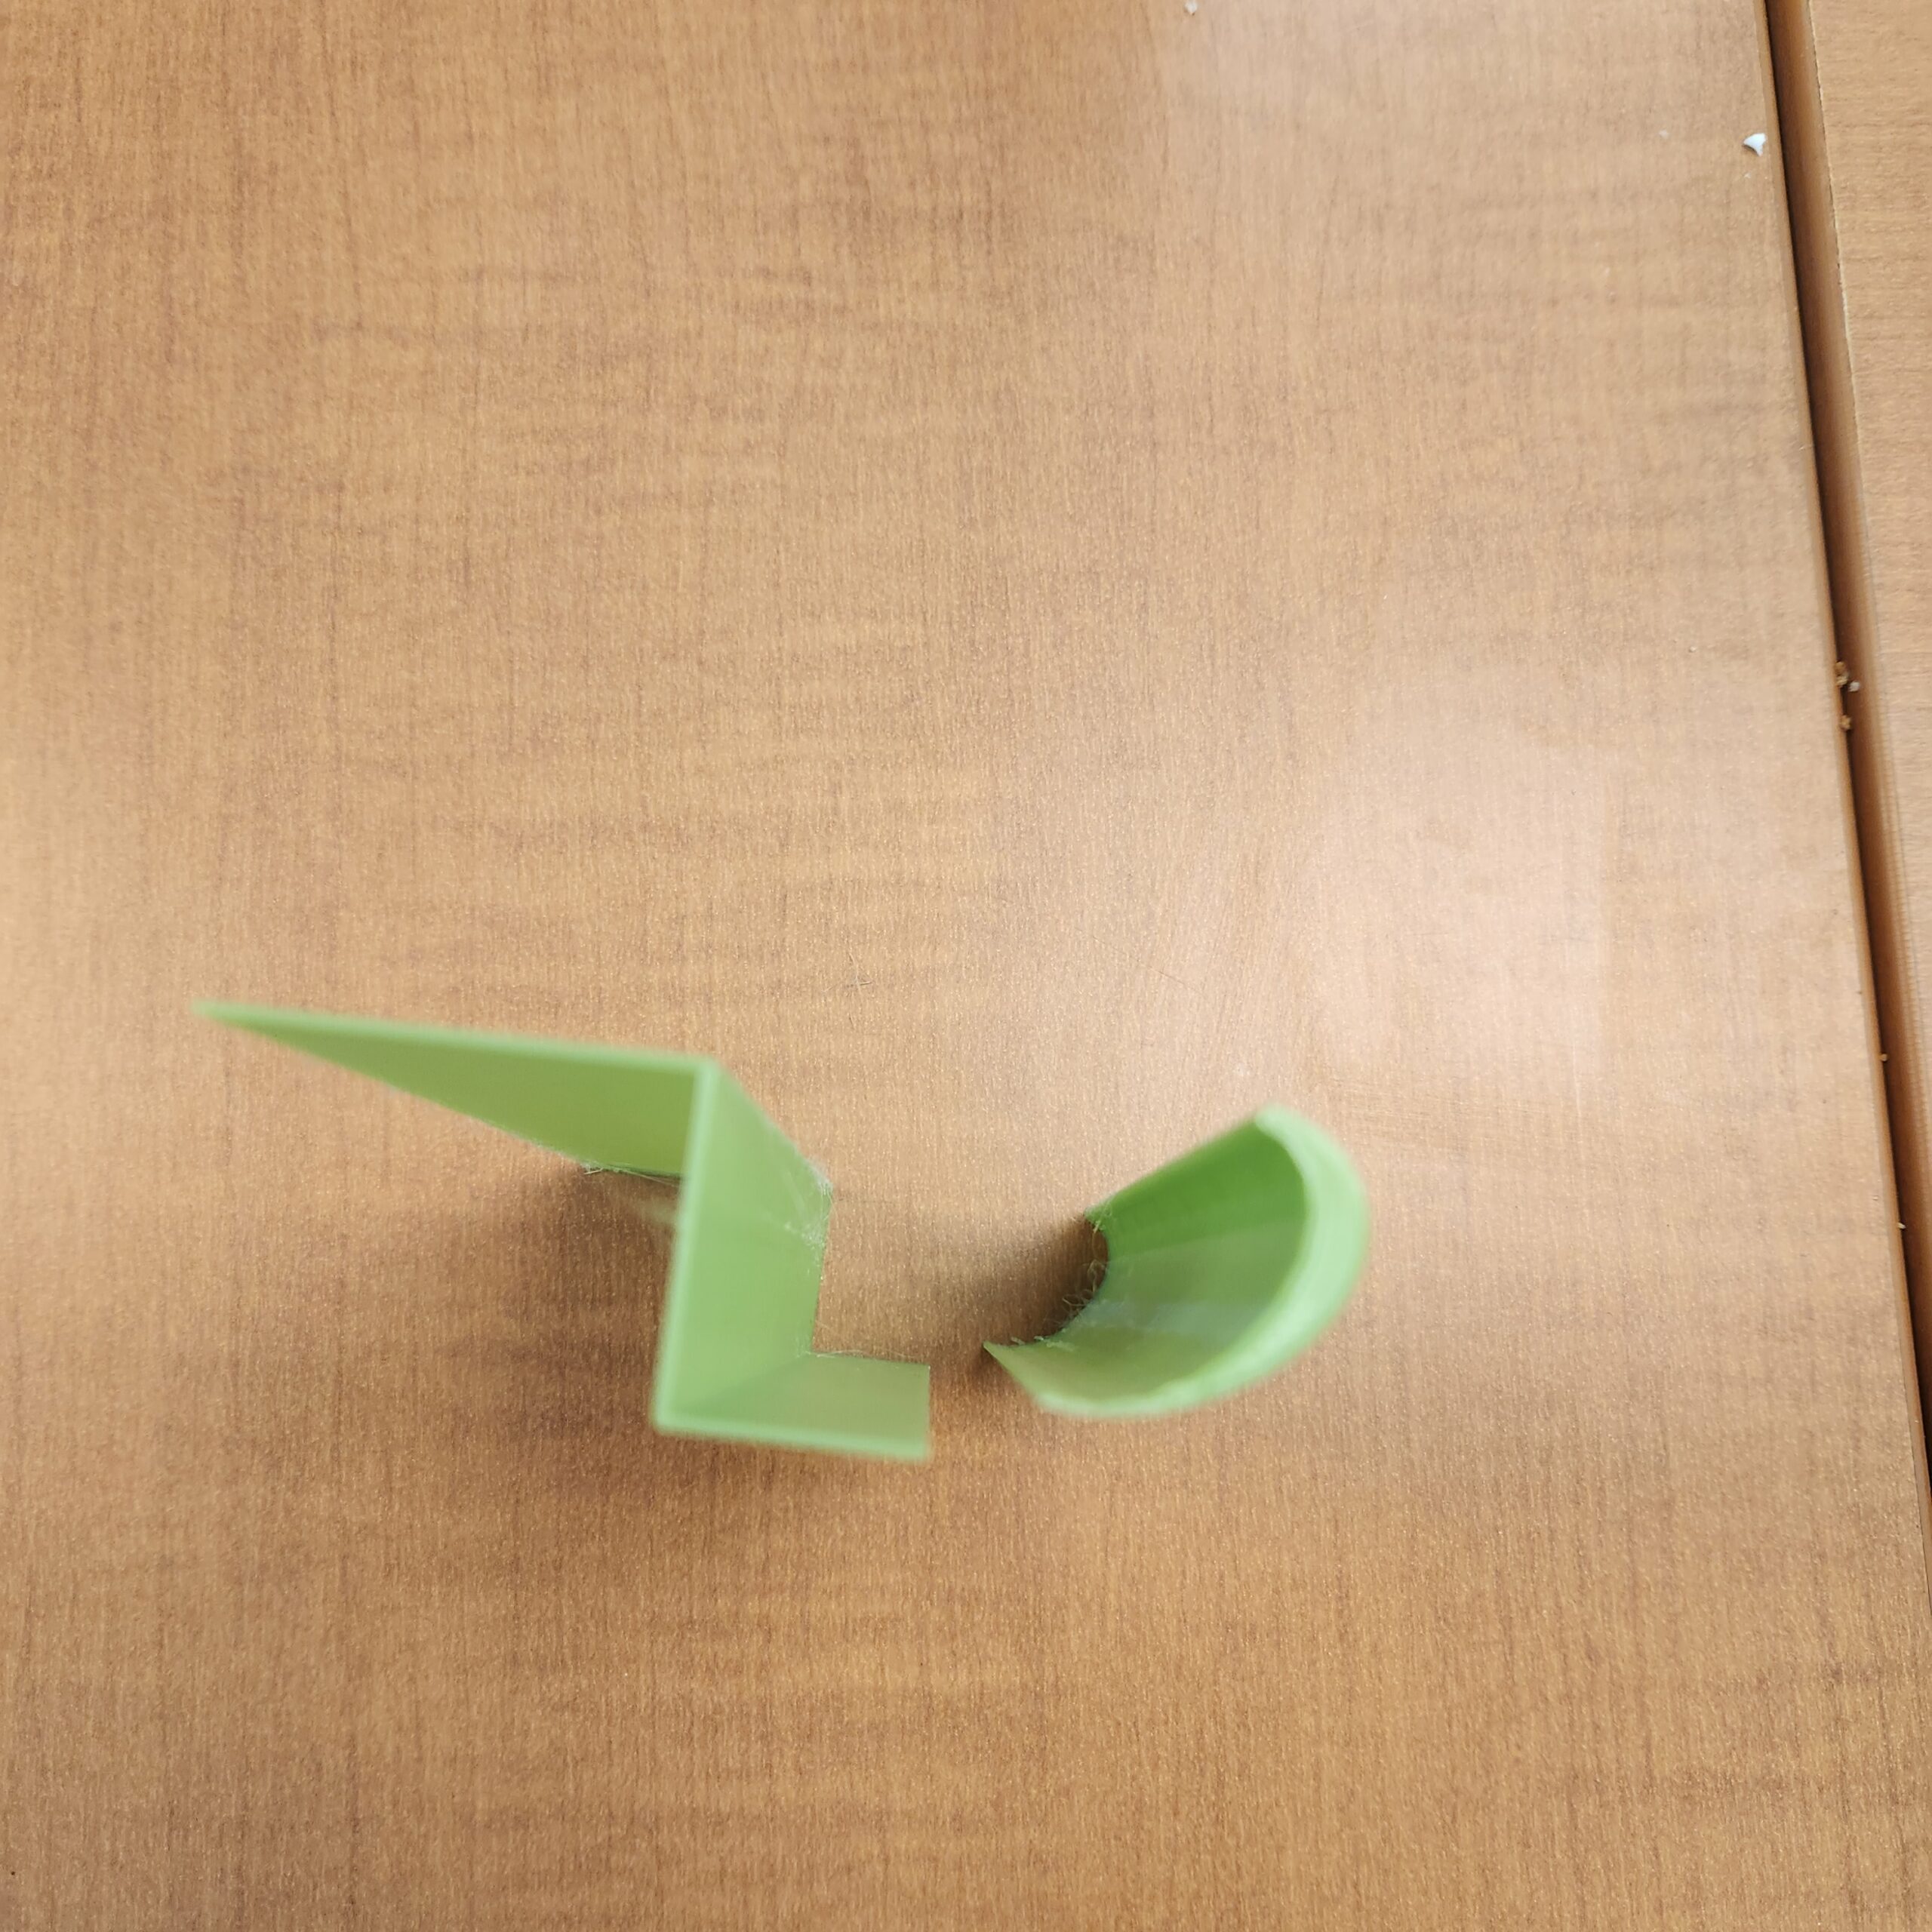
I was having trouble with the joints where the different shapes come together. This meant that when the item was removed from the 3D printer, it broke. My second attempt was a little better in that I got the dimensions right but it was still having a problem breaking when removed from the printer.
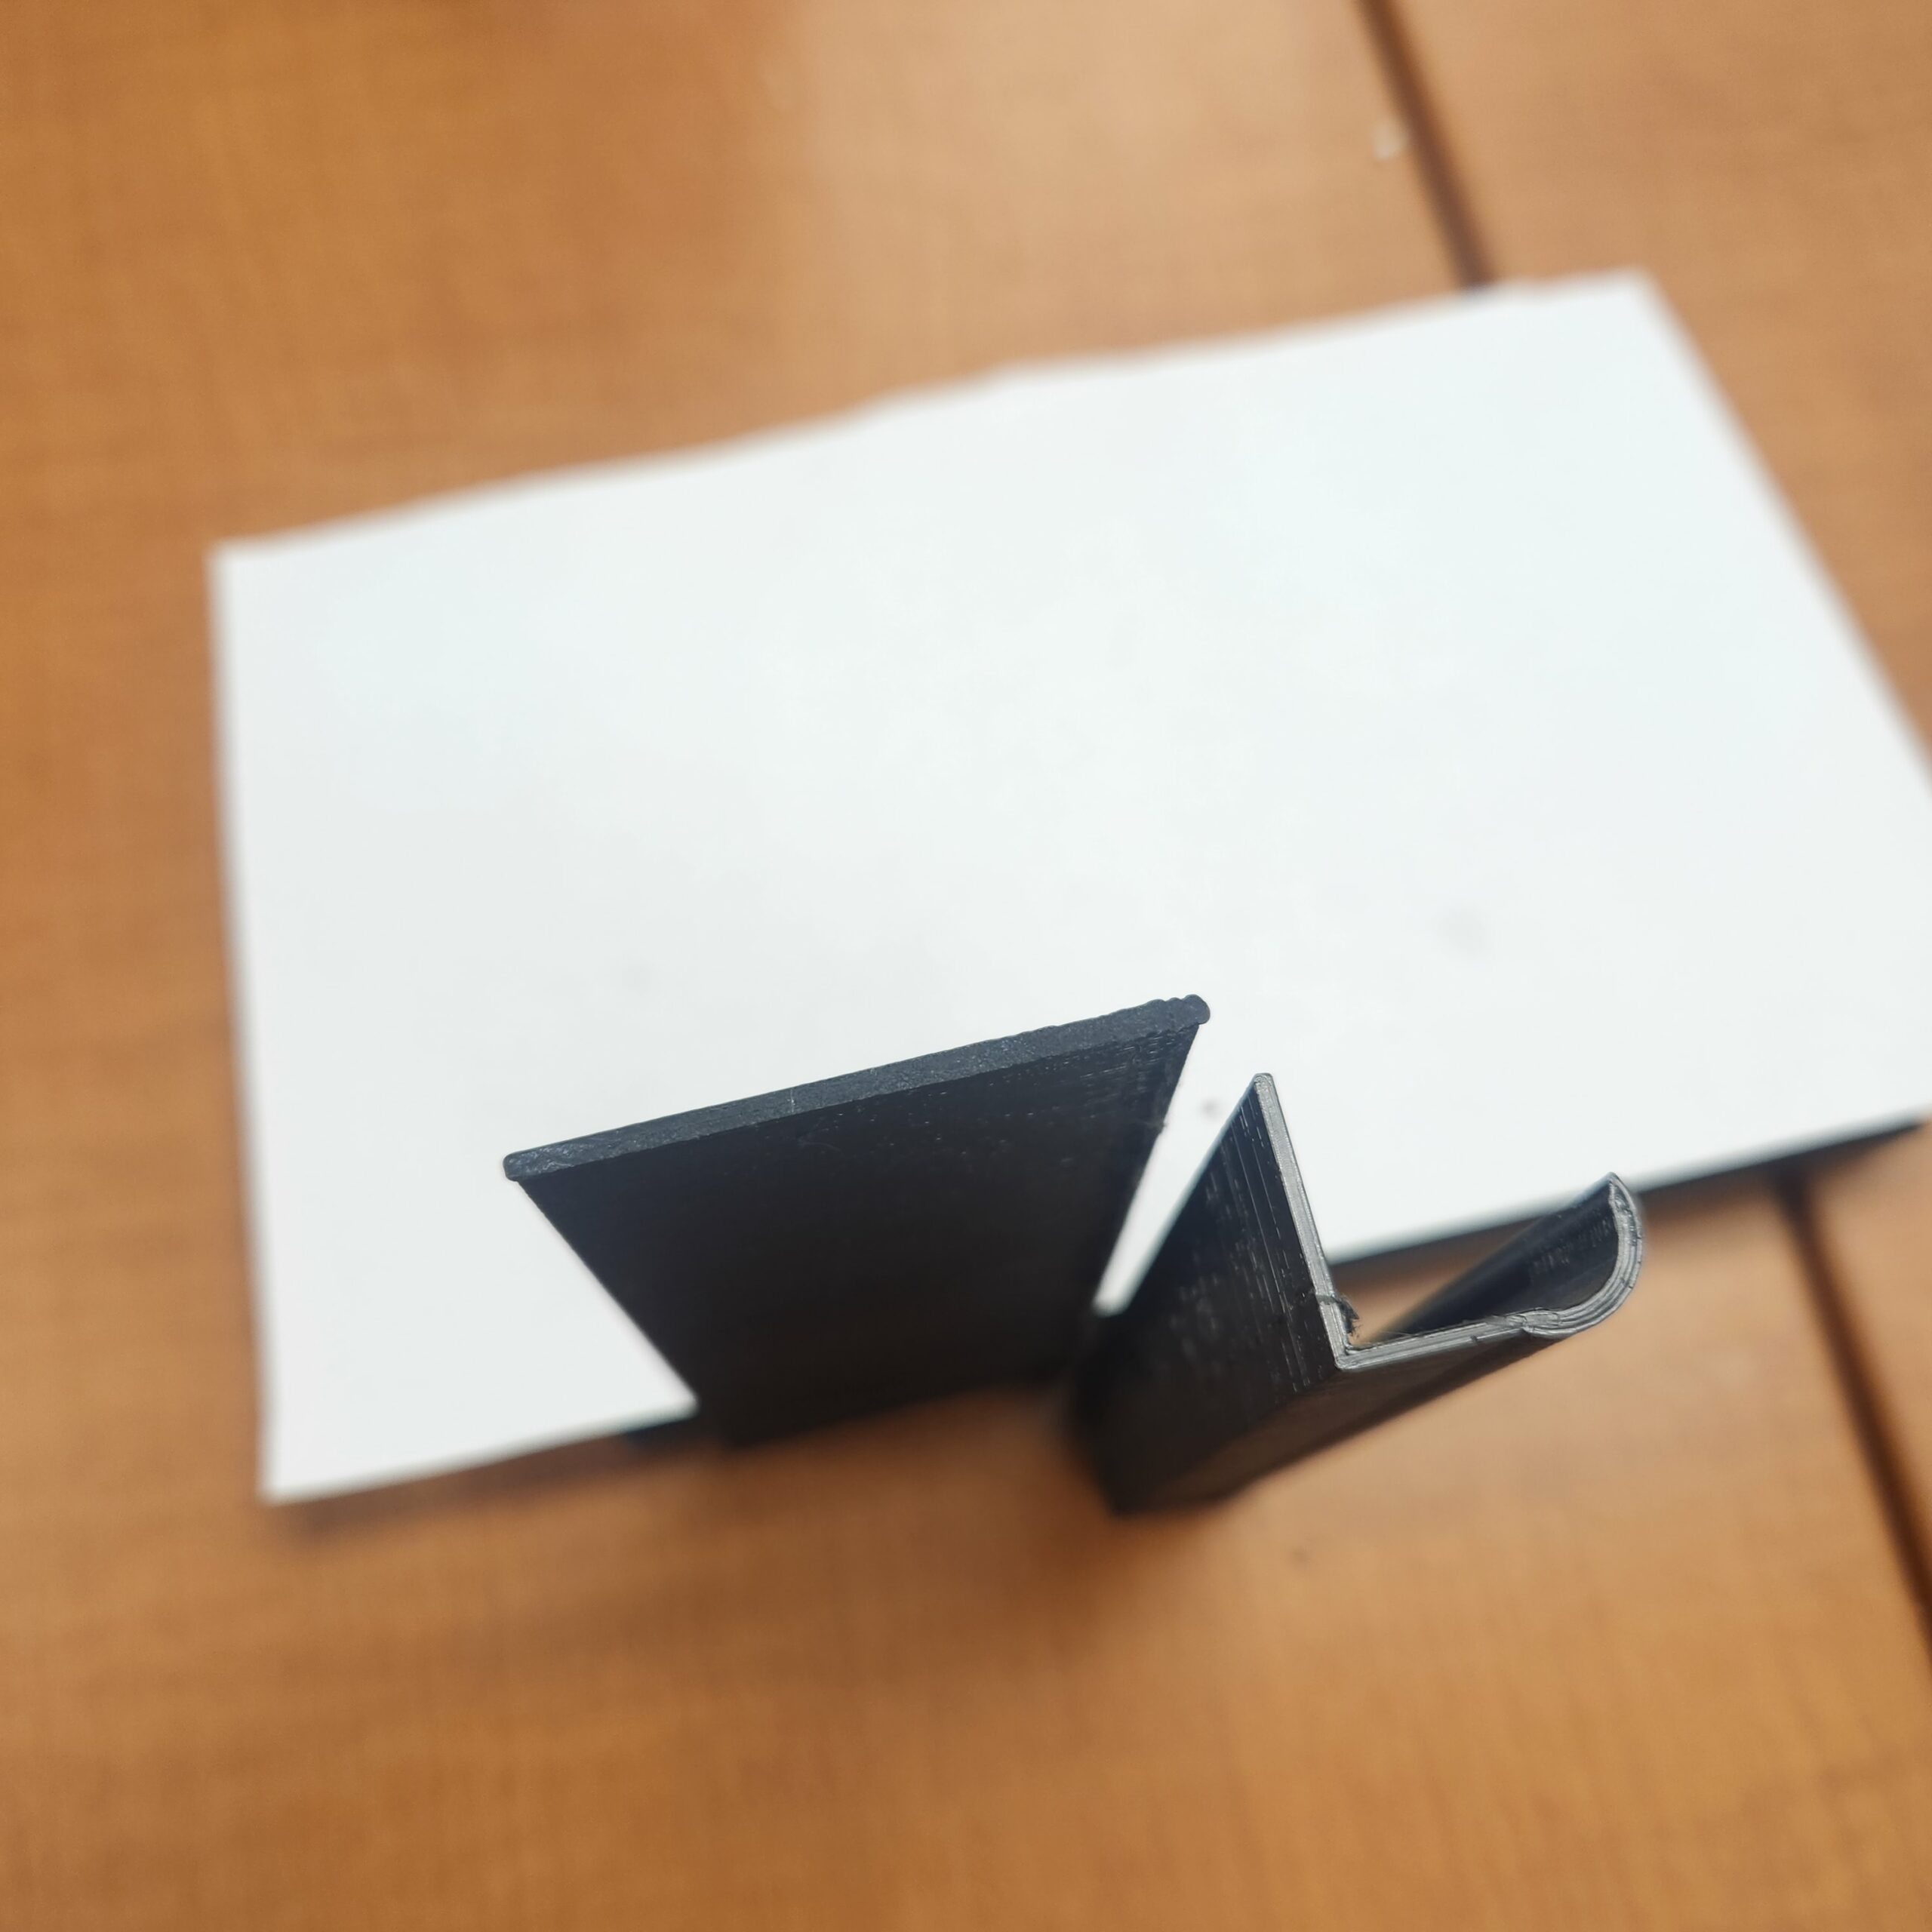
My solution to the breaking problem was twofold. First, I made sure that each section was “pushed” into the next section so that when printing the sections they would melt together as one. Second, I added a small triangle piece into the corner where the first and second leg meet in order to strengthen that section. When the finished hat channel goes on the cab that is where the piece needs to be the strongest.
Another thing you have to do when making a 3D piece like this is that you have to select all the objects on your Workplane and then merge the items together into one item. Otherwise, when you go to print you will print the one shape, then the next, then the next and so on, as opposed to printing the object you designed.
One of the great things about working in TinkerCAD is that you can move your object around in the tinkering program to look at all sides, including top and bottom. This is done by clicking and holding your mouse over the cube in the upper left-hand corner and then moving your view of the object, thus giving you a complete 3D image of what your design looks like.

My third attempt was perfect. It fit into the cab roof and the J hook fits over the windshield frame. Now I just needed to make about 13 more of those because, as was mentioned earlier, the 3D printer could only make about a 5-inch-long piece. I decided to print 3 at a time by copying and pasting my design two more times onto my Workplane. This would allow the printer to print 3 pieces at a time.
Once I got to the MakerBot online printing page I had to make a few adjustments to the settings in order to make a strong part. First, I had to adjust the Infill Density, which adjusts the density of the inside of the printed object. The next thing I had to increase was the Number of Shells which makes thicker and stronger walls. Increasing the Infill Density and the Number of Shells made the part stronger. The last thing I had to do was set the Raft to None. The Raft is a platform that allows the material to adhere to the build surface. This platform I found was not needed and made cleanup of the part difficult.
The print time for each batch of three was about 9 hours and 30 minutes. 3D printing is not a fast process but it is very cool to see your object come to life. It took me a few months with my work schedule and the schedule of the printer to get all the pieces done.
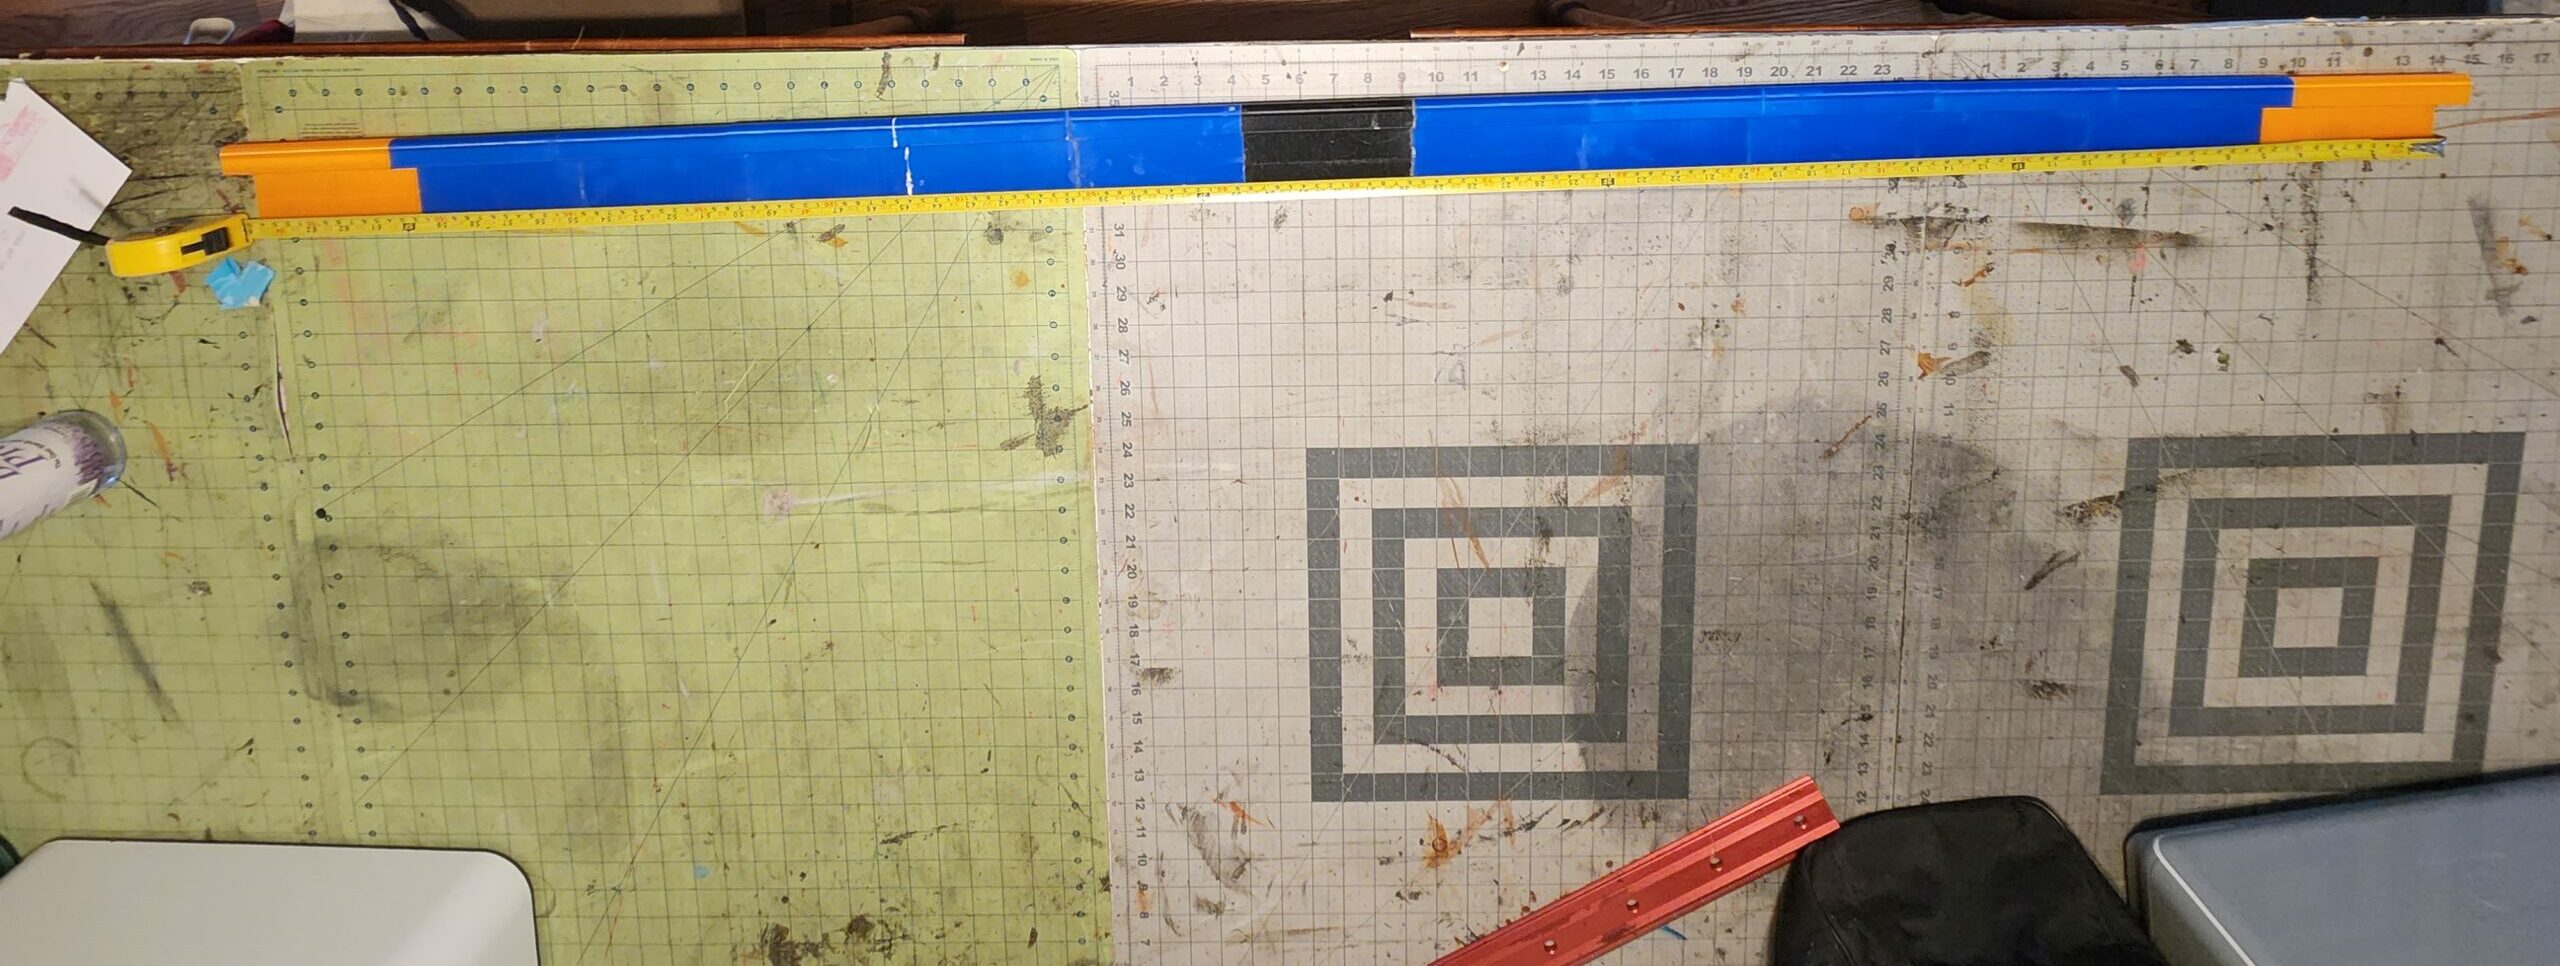
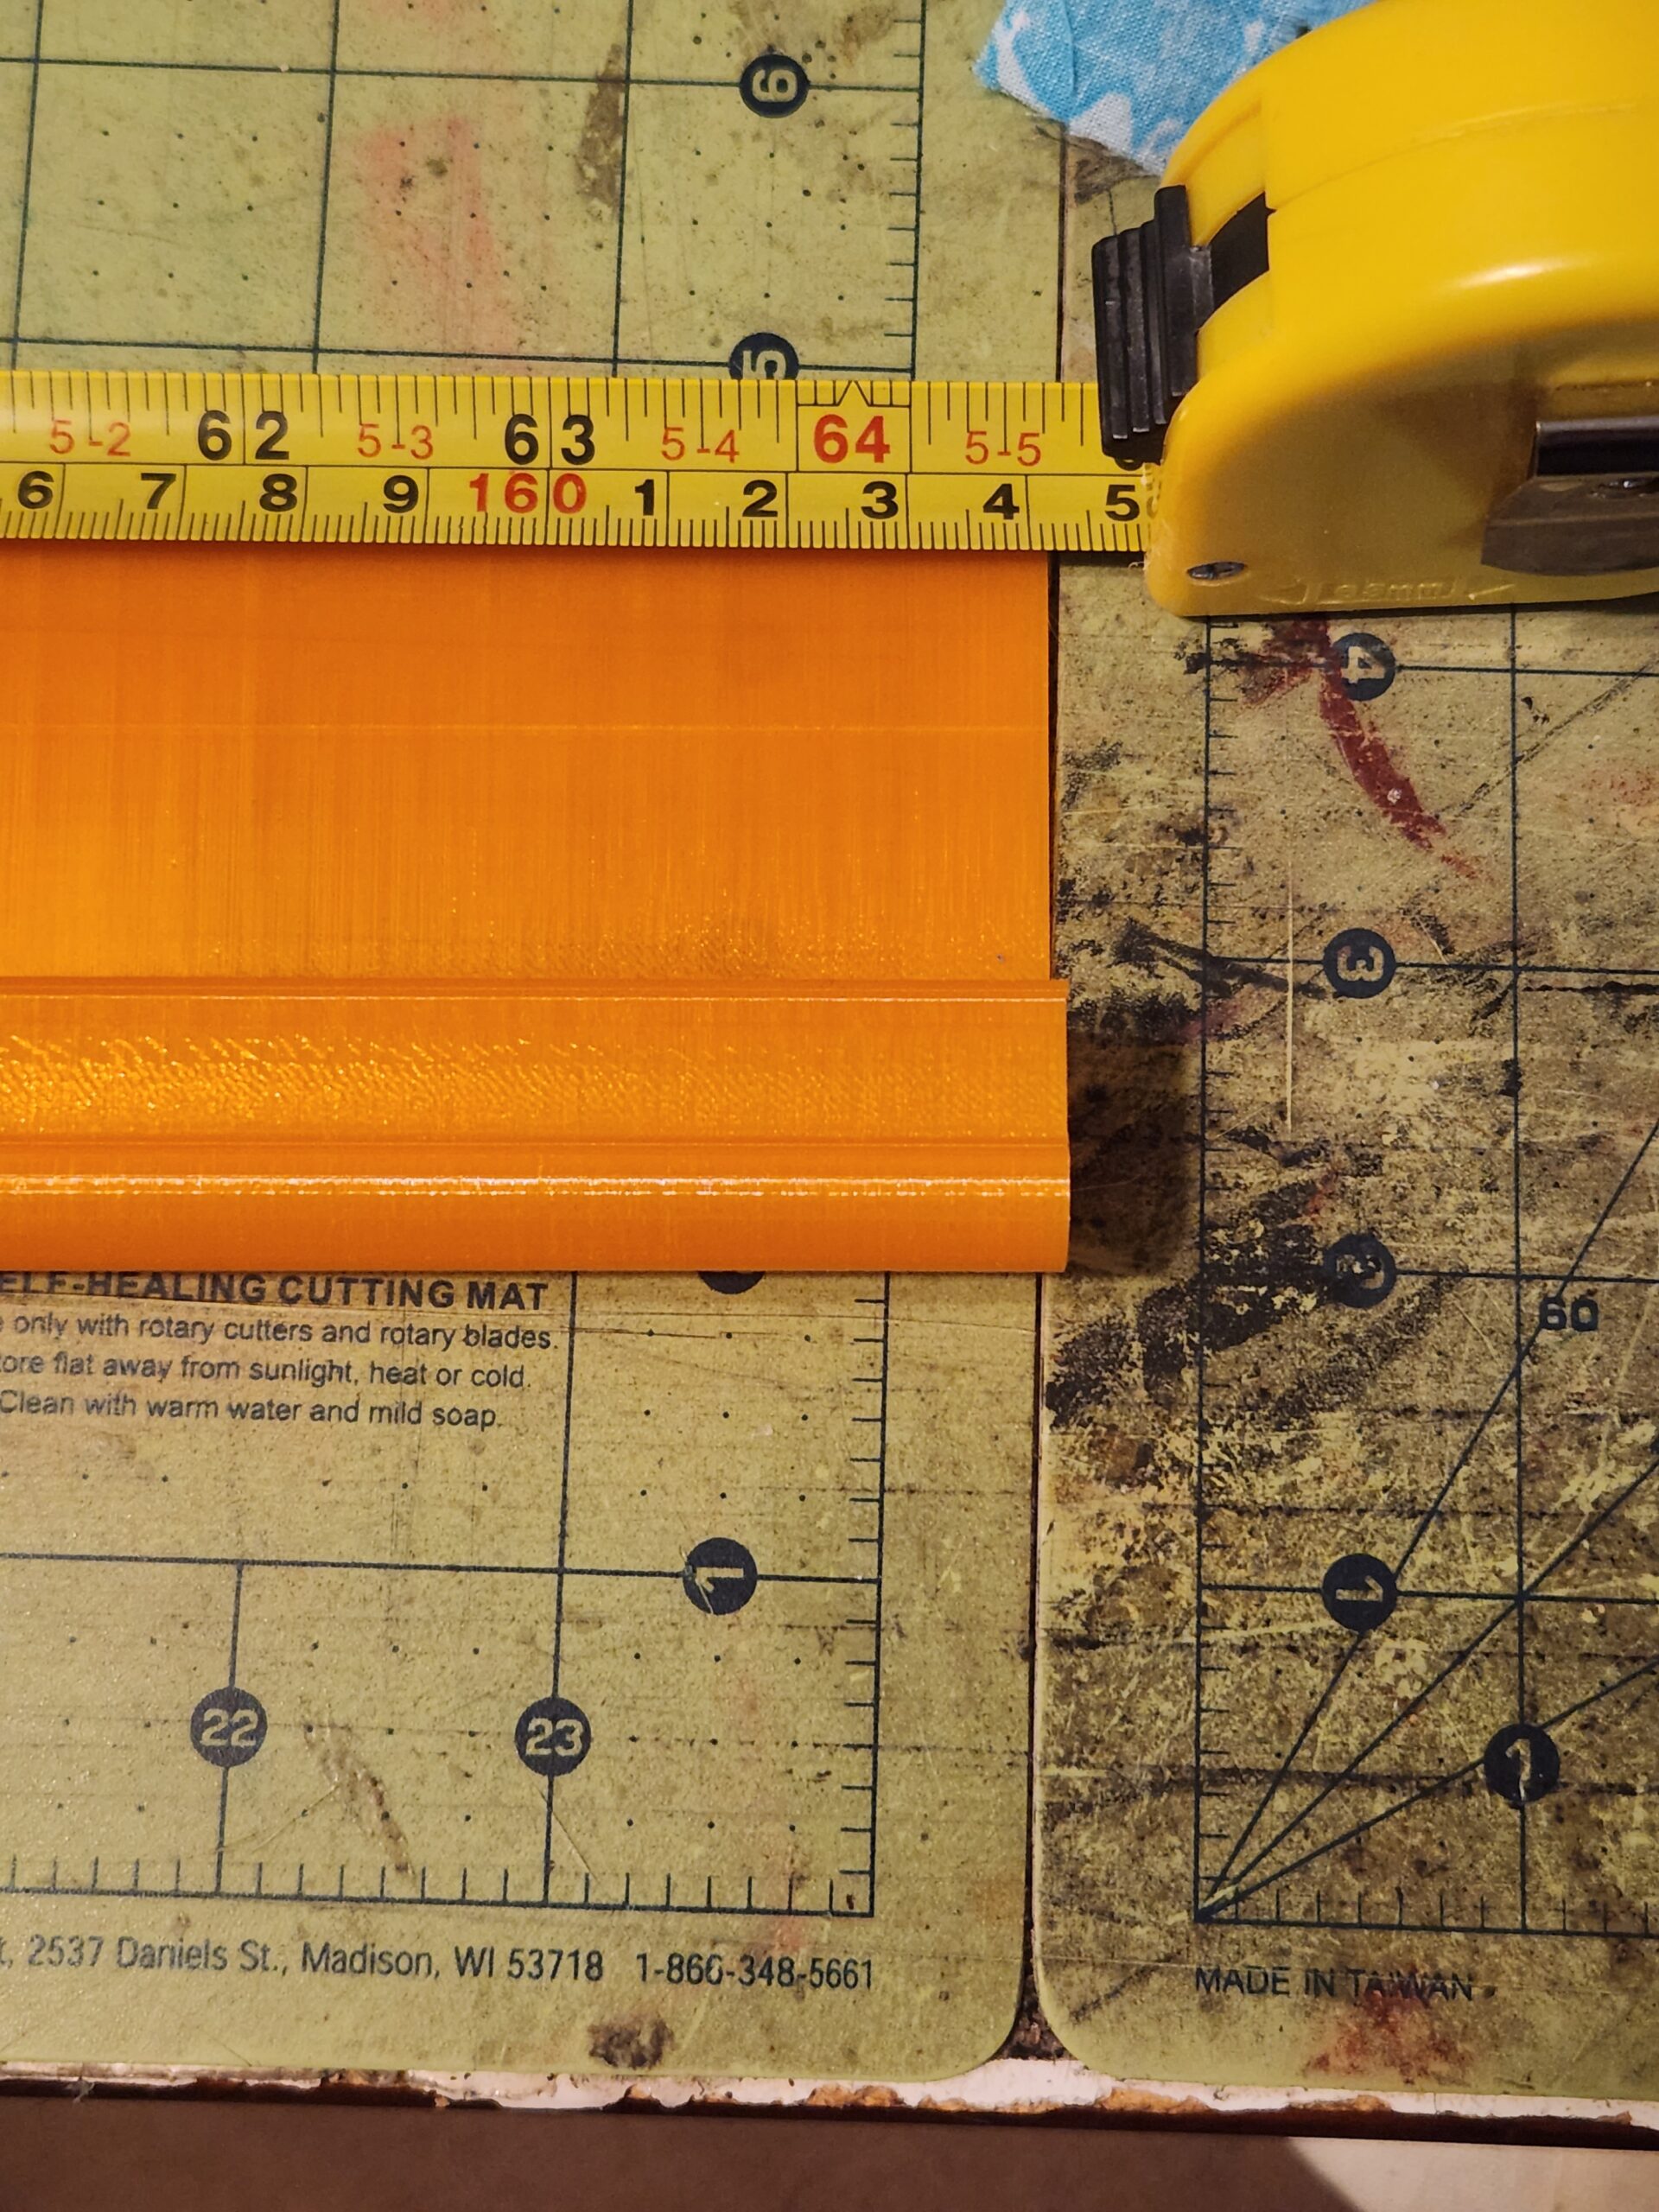
Next, I had to find a way to attach all of these pieces together so that it would make a 62-inch-long piece of material. When I researched the best way to glue 3D plastic together, the answer that kept coming up was to use super glue. I went to the DIY store near my house and I got what I thought was a super glue. It was not. It was a primate glue that said it was a super glue but in fact was a water activated epoxy. The problem with this product is that if you clamp two pieces together it doesn’t work as well when you join the pieces as I had to do. After I had glued a few pieces together, I was moving them and dropped them. They broke apart at the seams where they had been glued. So, back to the to Web I went, and found out that the primate glue isn’t “super glue” and that what I needed to buy was glue that has the main ingredient of Cyanoacrylate. I went back to the DIY store to look at the back of the packages to find Cyanoacrylate “super glue.” That did the trick. I was able to glue all the pieces together to make one long 64-inch part.
Here is the 3D printed part fitted into the cab roof.
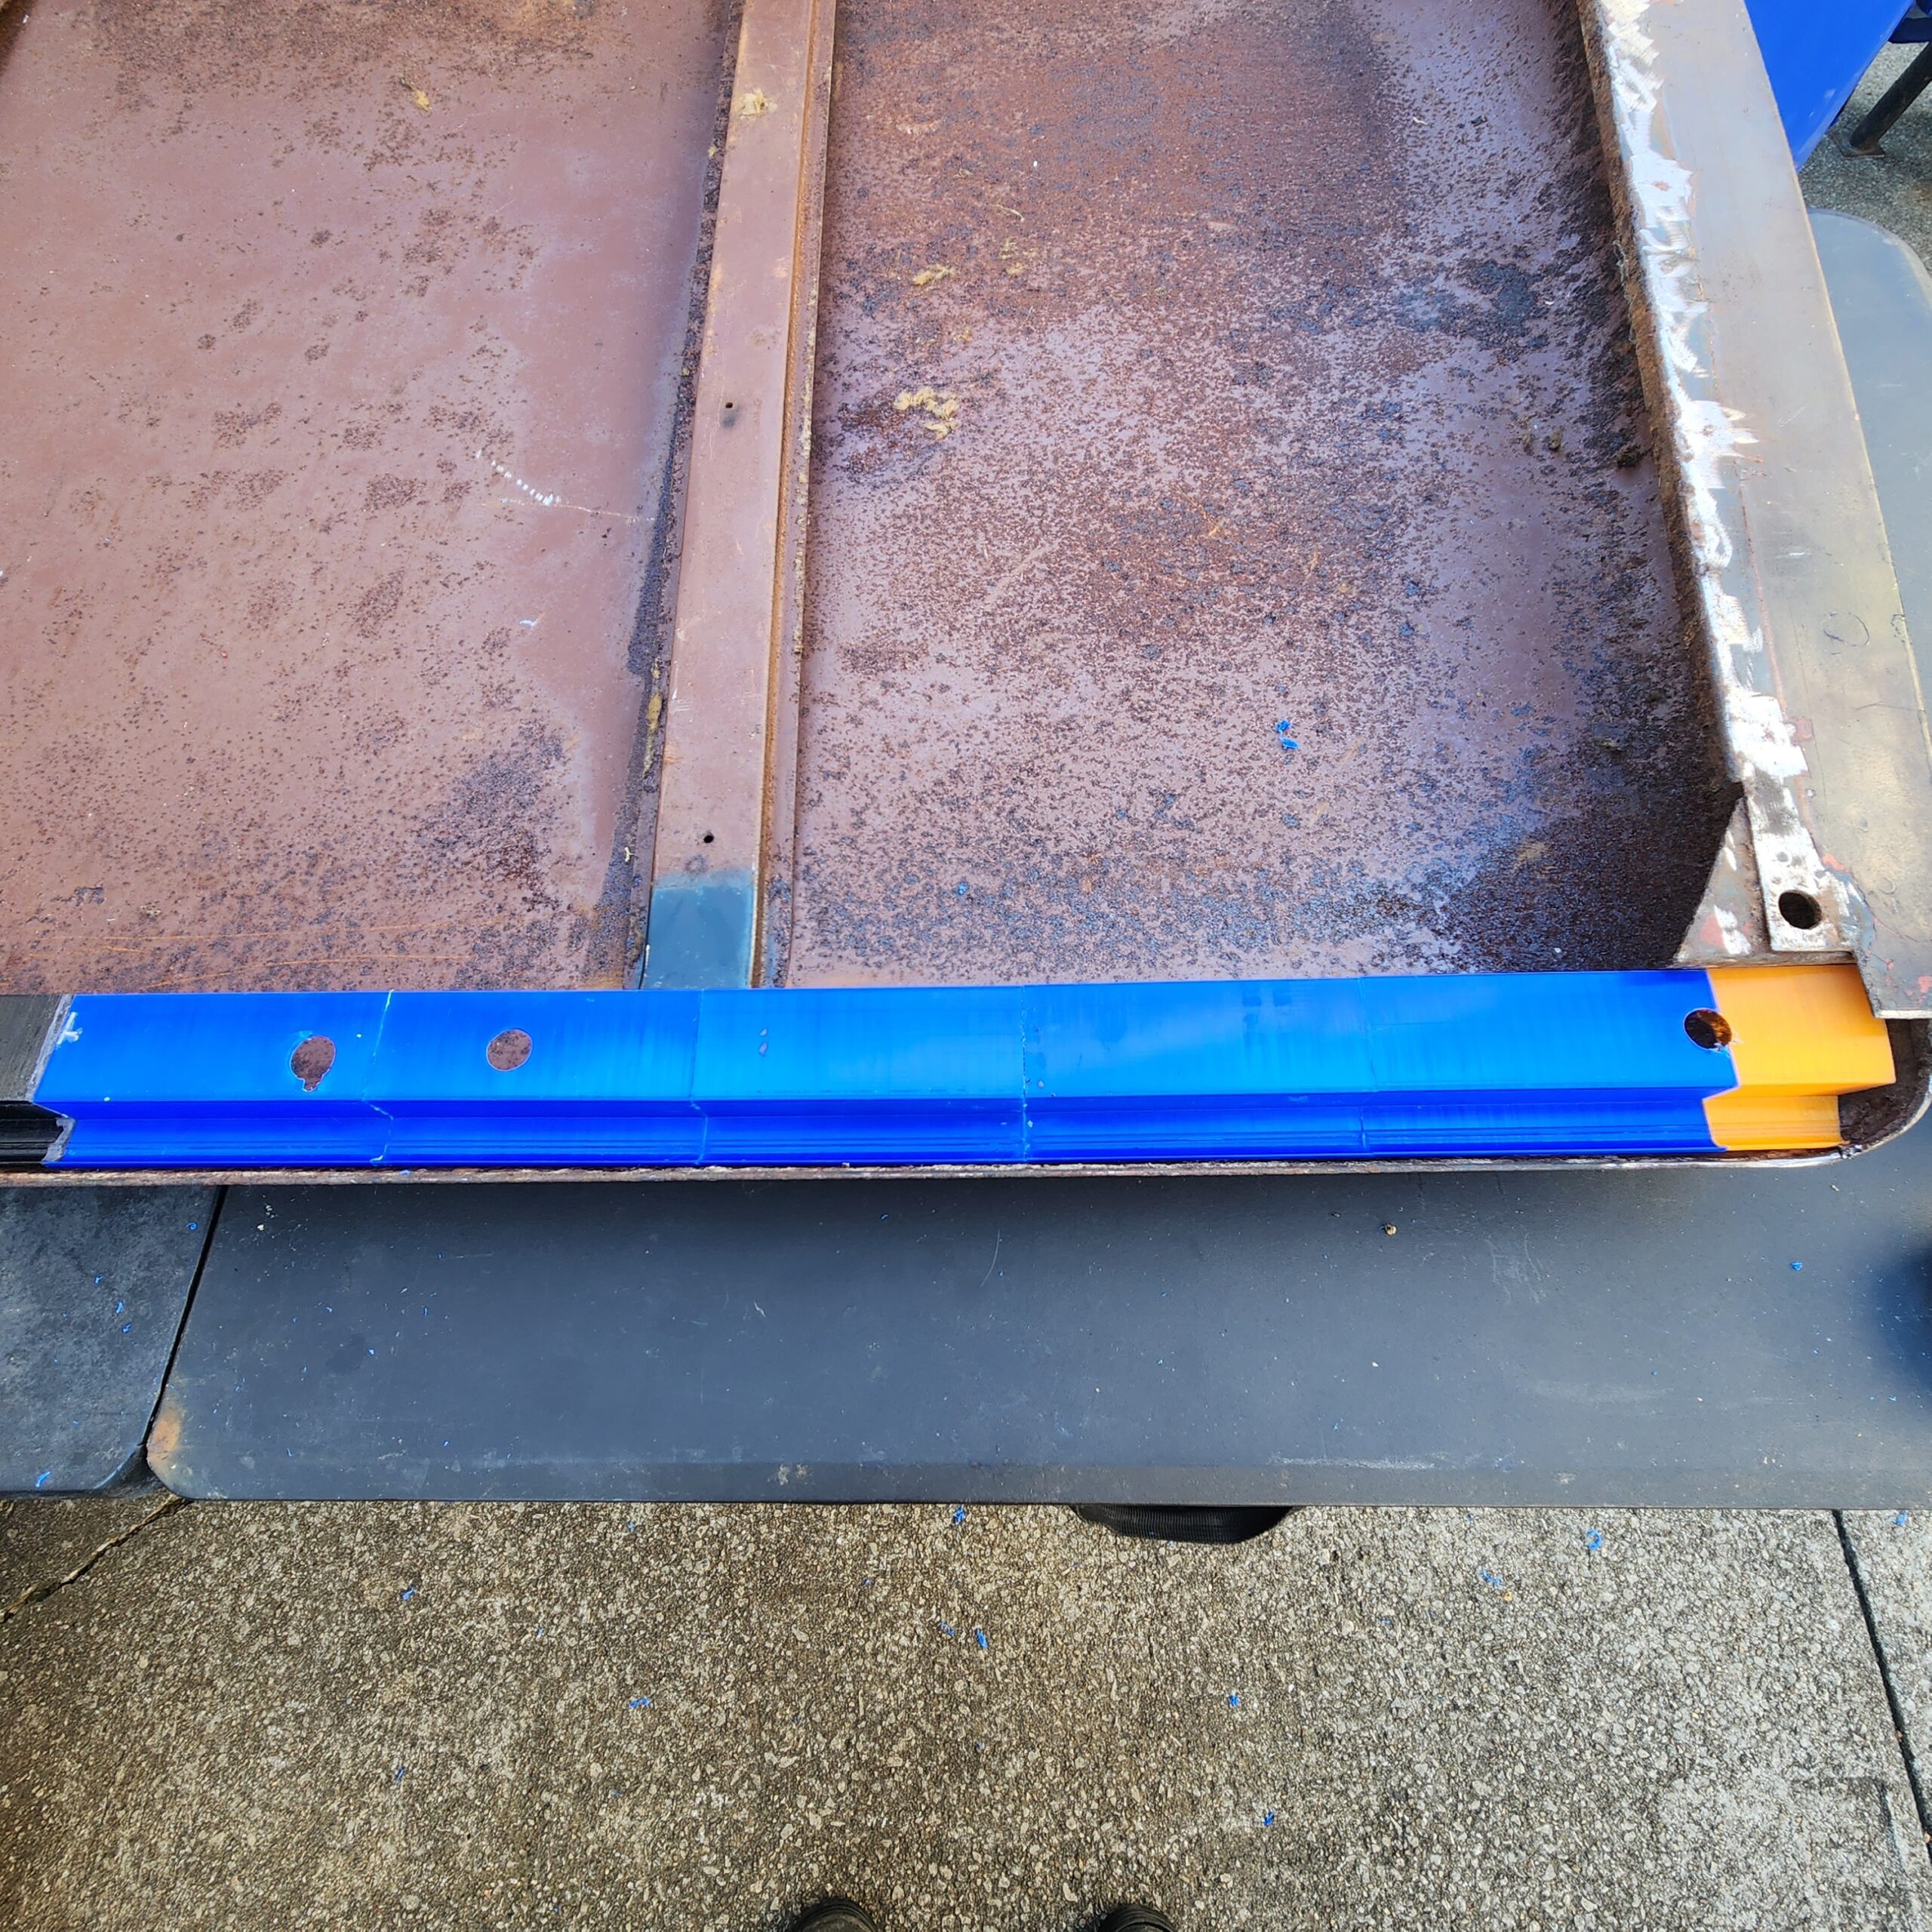
As you can see, I wasn’t worried about what color the pieces were and simply used whatever filament happened to be in the printer at that time. The hat channel will eventually be painted the color of the truck. My coworkers have asked my how I will affix the part into the steel cab roof since I can’t weld it in. That part is easy. Many modern cars are glued together with a two-part epoxy known generically as “panel bond”. I will simply get some panel bond from one of the many supply houses in Northeast Ohio and glue it into place once the cab roof has been sandblasted, primed, and painted. This will not happen until sometime in the spring or summer of 2023. Maybe I’ll post a follow up blog post when it’s done!
I hope this will inspire you to do you own 3D modeling and printing. I will be sharing a blog post on more features of the STEAM Lab and our 3D printers in the future, so keep an eye out for that!